Wednesday, August 28, 2013

INDN 212: Shade Creation

So, my initial thoughts on how to approach actually making a plan for the lamp shades was to acquire the bulbs I was going to use for the project. I felt I couldn't successfully make the shades if I didn't know exactly what I was designing them for. I went into Jaycar electronics, and incidentally, happened to ask him what his absolute favourite bulbs were in the store. He went and showed me a few MR16 LED Lamps, the bigger one shown below. Fully lensed, as well as having a sizeable heat sink behind them, the shape and design were perfect. And man is it a bright bulb. I definitely will need to recess the bulb deeply into the shade so that the light doesn't intersect with the users eyes.

As for the second bulbs for the smaller shades, I decided to go for a smaller variant on the same design. Applying the appropriate voltage and with normal use, LED bulbs can last well in excess of 10 years. The large bulb has 24 (!) LEDs, while the smaller MR11's have only 12. Very appropriate for what I want to use them for. If I really wanted to, I guess I could also dim them if that were necessary, but I'll see about that when I'm nearer completion.

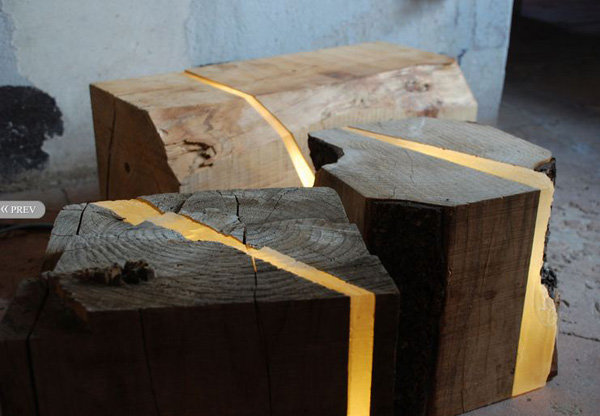
So, first thoughts were very much on "how big can I make it?". So, to figure that one out, I decided to get the muscle wire first. I ended up deciding on wire that could pull almost a kilogram when it contracted. That should be more than strong enough for what I have in mind. Then, in response to getting more data, I then decided to go for Beech for the wood for my shades, as beech is hard and strong, turns very nicely, and then it also isn't overly heavy for a hardwood.

With these things in mind, I then went out and got my wood. I was able to get one plank that was about 50mm by 100mm, since I then realised I would have to glue the two halves together. This would give me 100mm by 100mm to work with in terms of size. But I'm not too worried about size since I know I'm definitely going to go smaller than that.

Knowing the forms I wanted to make, I then was able to start getting my plans underway in Solidworks. I began with the larger shade, and planned out my measurements. I didn't want something that was too much longer than 10cm, while I didn't want it to be wider than 9cm. Knowing this, as well as the dimensions of the larger bulb that I wanted to occupy the internals of the shade, I was able to create a workable form.

Applying this same technique to the smaller shade allowed me to have a shade that felt like the child of the larger one. I made sure I kept a cohesive aesthetic between the two of them, ensuring that they would work as one whole.

 I glued my planks together over the weekend, and fortunately when I came in, the planks had neither warped nor cracked (apparently splitting can be an issue in the workshop over the weekends), and I was able to chop the pieces to length. Once I had my pieces separated, I then also trimmed the corners off so that the wood could be turned much quicker.

This is the setup that I started with. Fortunately, aside from the immediate wood loss from lathing, I wouldn't be "wasting" any of my wood, as I was told by the workshop technician that when I wanted to work on the other side of the plank I could just spin it around and mount it onto a scrap piece of wood, effectively reducing the wastage to zero.

I started out by facing off the piece, followed by drilling the main central hole. After than I used a wide flat drill to remove more of the wood, in keeping with the curve that I desired on the inside of the form. The idea for this is to make sure that i can fully form both sides by then reversing the wood in the lathe and having it rest on a piece of scrap wood.

Once I had done the internal structure, I then went on and did the external structure up to the haft of the chuck. Once I had that section done, I was able to reverse the piece and then fit it onto a piece of scrap wood and do the other half of the form.

 This allowed me to achieve the form that I wanted for this small shade. Doing the larger shade posed the same issues, while at the same time became much more difficult. Having one extra side on the form meant that I had to take an extra two steps to get it done. On the bright side though, I've now learnt (according to the technicians) everything there is to know about using the wood lathe, so anything feasible I could possibly want to do on the lathe is within the realms of my knowledge to achieve.

Sadly I didn't take any photos of the larger shade in production, but that's okay, the process was essentially the same, just marginally more complicated. And everything turned out beautifully. I'm really pleased with the outcome. I learnt what sandpapers were bad for my work, and that with hardwoods, you can actually use the woods own shavings to sand the paper down. I thought that was pretty damn cool, as it gives it this beautiful polish, which is a perfect precursor to the waxing of the wood I've become so fond of.

Sunday, August 25, 2013

INDN 212: Progress & Shade Forms

So, now that I've got my idea, it's extremely important that I get into the making phase asap, as I have a LOT  to get done between here and the deadline after the holidays. Partly the reason why these posts have been so sparse is that I've been playing far too many video games and not doing enough work, despite the fact that I love doing my work! I guess I just find work a little hard to get into at times, especially when I'm on break.

One of the things that I've been told is that the movement of muscle wire is severely underwhelming, so I may need to look into alternative measures for providing the motion. But I'm definitely going to give it a go and see how it goes.

Another issue that I've encountered is that the Arduino won't be able to supply the current the muscle wire or the lights need to function, so what I need to do to rectify that is add a relay system whereby the arduino can "activate" the circuits that need to power on. Relay switches can run a much lower current through them to activate a larger current/voltage.

The first part of my project that I needed to suss out was my shade design. The reason why I want to do this section first is because I'm still waiting on parts that are being shipped down, and as a result, I can't do any work on my arduino stuff just yet.

Image acquired from: http://www.designboom.com/design/studio-itai-bar-on-oded-webmans-bullet-collection-lamps/

These shades have a really neat aesthetic to them, and the flow between angular and curved is really pleasing to the eye. One thing I need to iron out with my form is what sort of direction I want it to take. These shades are made of concrete, while I want mine to be wood, mostly for the aesthetic and texture of the wood, but also for the weight, as the muscle wire needs to be able to lift it.

Image acquired from: http://www.designboom.com/design/raw-edges-studio-pinha/

These shades have a really great aesthetic to them,and the edges serve a particular purpose because of the way the shade is actually used. The shade serves as a mount for a customisable material and shape that the user can then wrap around and pin into the shade, allowing customisation of both the spread of light as well as the material the shade is made of. Mine won't be doing that, so the angles need to be possibly an abstraction of a considered form.

Image acquired from: http://modernhouseinsight.com

The form of these lamps is obviously inspired by flowers, and in many ways, the shape makes sense as a lamp shade. I believe that looking to nature as inspiration for this project is a good idea, but rather than taking it directly as it is, such as in this lamp, I could rather abstract it and then use the stranger forms as a basis for the design.

So, with this in mind, went about designing some forms that might work for the lampshade design. The flower I looked at primarily was the tulip, as I really like the way the tulip has such a basic form and doesn't feel too flashy. The most important aspect of this lamp is the motion of the outer lights, so I don't want to make the form feel too flashy.

Another idea that I came across was the idea that the movement should feel like it belongs with the shape of the shade. So, I decided against the possibility of doing a triangular shade, as I don't feel like a wide-based triangular flower would make the sorts of motions that I'm looking at generating.

After consulting with my tutor, I felt like the best option I had was the angular forms, as they really abstract the form of the tulip to something that is much more ethereal and alien. We're used to seeing curved forms all around us, and yet at the same time, Nature does sneak in some straight edges here and there. Geological crystal forms could be something to look at, as to me they kind of feel like millenia old flowers. Yes, yes, I know, very poetic, but that's how I've always seen them.

So, with those forms in mind, the smaller versions really need to feel like baby versions of the large one. The large one will not move, and will stay stationary in the centre of the whole light, almost as if it is old enough to cease caring about the motions of the creatures below it, while the outer lights are much more excitable and likely to respond to external stimulations.

Friday, August 23, 2013

MDDN 242: The ABC Project

So, I know I haven't done anything blog-wise for this class really, so I thought I'd do a final blog post for Project 2, just to give a total run down of my process. Initially we were given a letter to work with and then ideate on.

For the project, what we actually had to make was a letter than would be animated to be fully formed when the mouse was at the centre of the screen. The letter I was given was "J" (uppercase). My game for this course is "simple is best", and for this project, I really wanted to do something that was made up on many smaller parts.

Initially I looked at working with curving lines, but then I decided on something more linear. I decided that I could have a multitude of crosses make up my form. They would be scattered across the screen, and then come together to form my letter. My first challenge was to make the J actually something the computer program could actually recognise and work with. The computer doesn't actually know what a "J" is, so initially I had to make the J out of an array of points, that I would then have the Xs gravitate towards.

Making the array of Xs was slightly easier, as the location of all of them is randomly decided, rather than having to be specifically plotted. The Xs have 11 variables each, most of which are slightly randomly decided, ensuring that the wash of Xs isn't too linear. Another element that I got to play around with was the speed at which the Xs pulse. That's right, I got them to pulse. Cool or what? I got the Xs to pulse at different speeds as well as different interpolations. So they move at different rates at different times. That makes it much more interesting to look at.

Another aspect that I initially scrapped, but then re-considered was having something in the background going on at the same time. The reason I reconsidered it was because when the J was fully formed, the surrounding area on the canvas was and felt very empty. This was something I wanted to rectify, so I decided to have the background morph with the transition into the letter. I worked with extremely faded crosses for when the Xs are dispersed, while when the Xs come in to form the J, the background Xs would shift to a much darker and more imposing background that filled the surrounding space well.

One thing that I decided to change my mind on at the last minute was my colour scheme. Initially, I was working with a set of blue hues, but then I read the brief, where it stated that the colour scheme of the project should echo the Alphabet Book we initially looked at to start off the project. The colour scheme for that was red, black, and white, so I adjusted my work just a little bit to exemplify that.

Here is a little .gif for how the transition works, but it really doesn't show how the Xs all pulse. However, it does show the movements of the Xs from their initial points to their final locations, which is a big part of actually creating the letter. 

Fortunately, after a bit of research, I found a way of getting my sketch online. Sadly I can't get it onto my blog without breaking it, but you can view it over at Open Processing. Check it out!

Saturday, August 17, 2013

INDN 212: Ideation and Thoughts...

So, for this project, I'm thinking about doing something interactive, something that moves, and something that reacts to people's presence. I really like the idea of having something that is a character, something that you can laugh at, something that moves in a strange and unexpected way.

One of the things that I'm thinking of is using a PIR sensor, which is a Passive Infra-red Sensor, which essentially detects motion at a basic level. In combination with that, I'm thinking of designing something provides variable light at a dinner table, because often I find that the light over a dinner table, especially when it's static, can make a lot of things look rather flat, and it can sometimes ruin the impression of food.

So, as a result of the dinner idea, I thought, what if I did something along the lines of a modern chandelier/dining table lighting, which was both functional, while also having a certain degree of charm and character to it, inspired by natural movement and the materialities I want to use.

Involving the motion and the idea of characters of lights, my first refined ideas are all about getting a perceivable motion, and one that would really change the way the light is actually received by the surroundings. Having a moving set of lights provides a dynamically lit area, which is far more interesting than a flat, non-interactive light scape.

These two ideas involve the lights moving up and down at a slow, almost imperceivable speed, which would give the lights a strange, calm movement rather than a short, jittery one. The second idea looks at having the lights move along a rail, slowly tracking up and down the length of the roof-hanging support.

The idea to combine the lights with a PIR sensor brings this light into the realm of interactivity, allowing those who have a vague understanding of what the light does to intervene in its motion somehow. This interactivity sets the light apart from a light that merely moves along a pre-defined path. The light, rather than moving along any path, reacts in the way that a plant would to a dynamic surrounding. The light, with muscle wire on the inside, would curl up when it detects motion, and also turn on when it detects motion.

As for the design of the light, I want to go for a very simple, basic, beautiful form, one that people don't necessarily perceive as being special. I also have an idea which involves shrouding the PIR sensor so that it doesn't pick up all the motion in the room, but only the motion that is directly beneath it, as if it were only reacting to a person who sat directly beneath that particular light.

All of this would be controlled by a central Arduino processor, as there is really no way I could do all of this without the Arduino. So, that's another thing to learn!

Thursday, August 15, 2013

INDN 212: Autonomy Realisation & Inspiration

With respects to autonomy, this one was by far the hardest to define and actually find sources for. Generally, they aren't really thought about much, especially if they're lights which are only there when we really need them to be.

Autonomy: /ôˈtänəmē/
  1. (of a country or region) The right or condition of self-government, esp. in a particular sphere.
  2. A self-governing country or region.
When I think of autonomy, I think of something that needs little or no input to do its thing. Maybe all it needs is to be activated or maybe even just merely plugged in, and then it will run its own show. The possibilities for this are a little more strange, as we have to think about how this light is going to separate itself from something that is interactive or intervention. 

Image acquired from: http://www.geekalerts.com/

This light was one that we were shown in lecture, and I immediately took a big liking to it, as it really has this fantastic motion that it makes. It coils up, and not in a synthetic way, but in a way that actually feels really natural, almost like a Venus fly trap closing on an insect. The material by which the light is able to do this is called muscle wire, which contracts when a current is applied to it. I think that it's brilliant. I've already ordered some of the stuff so that I can make something with it.

Image acquired from: http://img.directindustry.com/

Another light that is autonomous is the exit light. They're always on at university, but it's when the lights go down in an emergency that they really come into their own. While on mains power, they charge up their batteries, and when the power goes offline, these lights stay on, lighting the way for people who are scrambling around in the dark trying to find the way out. I could possibly do something along the lines of exit lighting, but I'm not really sure there's much to improve on!

Image acquired from: http://blogs.babble.com/

Nightlights function along a similar line to the exit lights, however they work with sensors, something that I think will be an absolutely crucial part of any autonomous light, although, that said, even if you don't touch the light, it's still interacting with it in some way, so maybe for something to be autonomous it really has to be completely independent, aside from the on switch. 

Wednesday, August 14, 2013

CCDN 231: The Onion Data Board!

Well, I've finished the Onion Data Board. The laser cutting worked out really well, and the way that I designed the board means that all the data should be right there. The central rings are indicative of the senses each person focussed on. The outer layer is sight, and then continues with sound, touch, smell, taste inwards. The locations of the segment correlate to the subjects names around the board. Phrases used to describe the different aspects of chopping the onion are scattered around the board, and then various colours of thread link them to the people that said them. The center also demonstrates the cutting used by the subjects, as I replicated their cutting techniques as well. The onion juices also soaked into the wood at that point, giving the wood an onion scent as a last final addition and a center focus.

Onions are a very common component in student cooking. However, despite the universality of the onion in terms of usage, the way in which everyone experiences chopping the vegetable is extremely different. When prompted to speak of their experiences, my test subjects all decided to primarily focus on separate elements of the experience. The experience is at its very core one of multiple senses that for many dredges up emotions and memories. And this is only after you pull back to see the whole experience, because for many, the most defining experience of chopping onions is the stinging, eye-watering pain that it causes. But, upon a closer look, there is so much more to it.


Sight
The onions outer layer completely misrepresents what is on the inside. The brown, dry, papery, dead layer suggests nothing of the succulent flesh that resides beneath. When the outer layer cracks, the burst of light colour beneath completely shatters that image of dirty, brittle exterior. The flesh bleeds when cut, the juices stain the cutting board. Some of my subject chose to focus the visual experience not on the colours or textures, but on the rhythmic movement of the blade, and acted with care. Thomas and Henrietta focussed on the Visual.


Sound
The cutting of the onions goes through three different sonorous phases. Initially, the cracking of the papery skin is loud and echoing. This auditory experience is substituted by the crunching of the individual layers of the onion failing under the knife, and this noise slowly decays into a rhythmic clacking of the knife on the board. Occasionally the knife gouged the board as well, an element I physically explored on this medium of presentation. Mark focussed on the Sound.

Touch
Some of the onions seemed to have small pieces of dirt on them, which rolled and disintegrated under the fingers, letting the touch experience shift to the papery feel of the onion. The cracking of the outer layer is violent and the onion can sometimes fall from the hands to the bench. The skin then shifts to spongy and resistant, with the dry exterior giving way to stickiness with the juices leaving the cells of the onion. Gemma and Michael focussed on the Touch.


 Smell
The smell is virtually non-existent until the first incision is made. Soon after that, the smell rises quickly, and creates an atmosphere of expectation. Soon, the cooking will begin. The scent of the onions permeates the fingers, and the light acidity stings in the nostrils. The smell is strong, and to some unpleasant, while others enjoy the scent. Tom and Gemma focussed on the Smell.

Taste
Considering nothing was eaten, this was a hard one to pin down for my subjects. Almost all of them claimed there had not been a taste component, while the other insisted she could taste the raw onion as a sort of aura around the cutting area. The taste aligns heavily with the smell in that regard, as they are inextricably linked. Henrietta alone focussed on the taste.

INDN 212: Interaction Realisation & Inspiration

As for interaction, interaction is a little easier to define.

Interaction: /ˌintərˈakSHən/
Reciprocal action or influence: "interaction between the two countries".

The way I think I want to define interaction is more in the sense of an action you have with the light creating an event, or chain of events. This could lead to an interesting light display, or alternatively the switch mechanism for a simple light could be a very specific interaction, maybe a specific motion set or alternatively the resultant motion of the light or the switch could be a totally new experience.
Image acquired from: http://www.flickr.com/photos/bubbleofinterest/4459443167/

This series of small lights provides a really interesting ambient illumination , and together create an experience as a whole, each one almost reminiscent of a blade of grass or a toi-toi. They could possibly be activated by the movement of the wind as well, which would allow for them to be both interactive and autonomous.

Image acquired from: http://hiddentreasuresmag.com

This light is really cool, because while the activation of it might be quite mundane, the control of the light and how it projects its light would be where it would be the most interesting part. It appears that the individual blades of the light shades gives the user a large degree of freedom and control with how the light is projected around the room.

Image acquired from: http://www.dvice.com/archives/2012/09/interactive_clo.php

As a major installation piece, this is a very metaphorical and yet quite literal light. The individual bulbs appear to all have pull strings to turn them on and off, which would almost allow people to turn on "their" bulb and lay claim to it in a way. This would allow for quite a personal encounter with the light, which would slowly grow in intensity as more people interacted with it.

Tuesday, August 13, 2013

CCDN 231: Lasercutting Data Terminals

I decided due to cost that rather than having a pine board all the way through, I would in stead have a pine board with an MDF backing that I could sink hte nails into. Everything worked out beautifully. I didn't have any issues with the laser not cutting all the way through, not did I have any problems with the etching being too difficult to read.


Now I just need to glue it together and then make the magic happen!

INDN 212: Intervention Realisation & Inspiration

Okay, for now I'm at a real loss as to where to start this project, so I decided it would be best to just get some research under way and really get some clarity in my mind as to what to do for this project. The project revolves around three words. Intervention, Interaction, or Autonomy. Our new project, revolving around creating another light, is meant to affix itself to the meanings of one of those three words.

So, to figure out exactly how I'm going to do it, I'm going to look at each word individually and interpret them with precedents and meaning.

Intervention: /ˌintərˈvenSHən/
  1. The action or process of intervening.
  2. Interference by a country in another's affairs.
I think that in this project, intervention is intended as a word to mean intervening in a space or a real-world issue. This could be in an artistic way, by performing a sort of spatial intervention, where the lighting intervenes in the space so as to change it or manipulate how it is perceived. It could also be as a response to an issue, and provide a means of intervening in said issue, so for example emergency lighting, task lighting, or something else along that line of thought.


Image acquired from: http://www.unurth.com/filter/Intervention

This lighting is a form of spatial intervention, providing a strange, ethereal light that is reminiscent of fireflies or glow worms. The lighting on all the books is making a statement about the traffic in the city, and replacing it with literature. The effect on the feel of the street is astonishing.


Image acquired from: http://payload.cargocollective.com

These lights are really strange. Constructed from the plastic bottles that are used in hospitals for men to capture urine samples in, the light is strangely reflective of what the bottles would have been used for, and it makes a commentary on the lack of public toilets in the city, and how many men will simply urinate on the sidewalk, even often in plain view of others due to the lack of public urinals.

Image acquired from: http://www.evolo.us/architecture/repurposed-wood-used-to-create-light-filled-furniture/

I really like these lights. Some day I want to make one like it. I think the medium of the wood is highly effective, as it provides a basis for the whole piece to work from. The light from the wood blocks feels like it is meant to be there, due most likely to the look of the material in that space. It looks like sanded and chipped yellow resin, which just works really nicely with the natural look of the wood, as it could look like the sap from the wood, coalesced into a very defined form.

Monday, August 12, 2013

CCDN 231: Phase Two

The first phase is completed, and I've decided to go with the chopping of the onions as my activity to pursue further. This interaction is an interesting one, as it really does engage all of the senses in my experience. Sight is activated by the visual element and excitement of chopping the onions, smell is definitely affected, touch and sound also provide ample stimulation, while taste is a bit of a dud. Some people pick up on a taste, like myself, while others ignore the taste component and/or don't sense it.

Subject 1: Henrietta
Focussed on visual stimuli as well as taste. As a synesthete, made particular mention of the sound looking yellow.

Subject 2: Mark
Focussed on aural stimuli. Made particular mention of his focus on his cutting technique.

Subject 3: Thomas/Tom
Focussed on visual and smell-based stimuli. Made mention of the disintegration of the onion from large to small.

Subject 4: Gemma
Focussed on tactile and smell-based stimuli. Made mention of many of the mundane aspects that others forgot, such as colour and form.

Subject 5: Michael
Focussed on tactile stimuli. Made particular mention of the feel of the onion in his hands.

Now, I have to plot said gathered data and figure it all out! What I plan to do is laser cut all the information I need to onto a wooden board and then use that wooden board as a base to connect a lot of data-placed nails together with different colours of string (signifying different sense stimulation) and then link those to the different subjects. I might do some other stuff too.

Sunday, August 11, 2013

INDN 212: Spatial Division

Well, the project is finished! I'm really pleased with the results. The light really creates the metaphorical space division through the form, as well as the literal division with how the light is created.

This is the space I was working with. My desk space, I wanted to minimise the amount of space that my desk lamp takes up. The space that I actually ended up designing my light for was actually an imagined space, and targeted towards those people whose homes don't have a huge amount of space to work with, and where spaces sit directly next to each other and potentially intersect.

My light is something that I want to make interconnected spaces feel connected with but still maintain a degree of spatial separation. I took a lot of inspiration from the forms in my anglepoise desk lamp, especially the curve of the shade, but also the angles made by the light and its form. I didn't actually keep any of the components, but I wanted to keep the purpose of the light and what it fulfilled in that respect. I'm really looking forward to presenting it!


Work Space 

Social/Relaxation Space 

Spatial Separation